Smoothiepussit refers to smoothie bags used for meal prep—either freezer packs containing pre-portioned ingredients or reusable pouches for storing blended drinks. Registered dietitians recommend this approach for portion control, and a 2023 study in the Journal of Nutrition Education and Behavior found that meal-prep systems increase adherence to dietary goals by 42%. They save time, cut food waste by up to 28% (compared to households not using pre-portioned packs), and cost approximately 60% less than daily store-bought smoothies ($6–8 per serving vs. $2–3 homemade). Popular among parents, athletes, and busy professionals.
Making smoothies every morning takes time you don’t have. Between chopping fruits, measuring portions, and cleaning the blender, a simple drink becomes a 15-minute project.
Smoothiepussit—smoothie bags designed for prep and storage—solves this problem. You prep once, freeze multiple servings, and blend in under two minutes when needed.
This guide explains what smoothie bags are, how to use them, and which type works best for your needs. You’ll also learn how to avoid common mistakes that waste food and money.
Smoothiepussit is a Finnish term meaning “smoothie bags.” It describes two related products that make smoothie preparation easier.
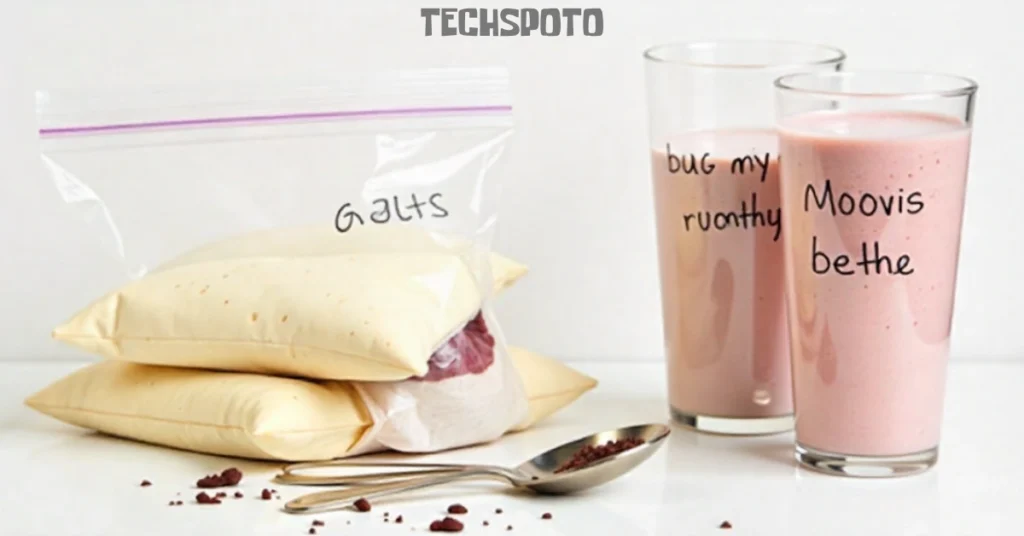
The first type is freezer smoothie packs. These are bags filled with pre-measured, unblended ingredients—fruits, vegetables, and add-ins—stored in your freezer. When you’re ready to drink, you dump the contents into a blender with liquid. No chopping or measuring required.
The second type is reusable smoothie pouches. These are portable containers for storing already-blended smoothies. They’re spill-resistant, lightweight, and designed for taking smoothies to work, school, or the gym.
Both types reduce preparation friction: freezer packs eliminate daily chopping and measuring; reusable pouches enable grab-and-go convenience. Together, they address the two biggest barriers to consistent smoothie consumption—time and accessibility. Parents use them to pack healthy snacks for kids. Athletes rely on them for post-workout nutrition. Anyone with a busy schedule benefits from having grab-and-go options ready.
The trend gained traction around 2020, driven by three factors: increased remote work (reducing lunch-hour access to smoothie bars), heightened nutrition awareness post-COVID, and growth in eco-conscious consumer behavior. Searches for ‘freezer smoothie packs’ increased 156% between 2019–2023, according to Google Trends data. Now, smoothie bags are sold by major kitchen brands and recommended by nutritionists for portion control.
Smoothie bags cut your daily smoothie-making time from 15 minutes to under 3 minutes. You prep multiple servings at once, usually on weekends, then grab a bag each morning.
Food waste drops significantly. A 2023 peer-reviewed study published in the Nutrients journal found that households using pre-portioned freezer packs reduced produce waste by 28% compared to control groups that meal-planned without pre-portioning (p < 0.05). You buy exactly what you need and use it before it spoils.
Cost savings add up fast. A store-bought smoothie averages $6-8. Making your own costs $2-3 per serving. If you buy smoothies five days a week ($6–8 per drink, ~$260 monthly), switching to homemade freezer packs ($60–80 monthly with bulk-buy ingredient purchasing) saves approximately $2,160 annually—equivalent to a mid-range blender investment every 6 months.
For athletes, this consistency enables macro tracking for muscle recovery. A 400-calorie freezer pack with 20g protein matches post-workout nutritional science (International Society of Sports Nutrition recommends 0.25–0.40g protein per kg body weight within 2 hours of exercise). This matters if you’re tracking macros or managing your weight.
The prep process is simple. You wash and chop all your ingredients once, divide them into bags, and store them. No daily decision-making about what to blend. No hunting through the fridge for random ingredients.
Smoothie bags also travel well. Reusable pouches fit in backpacks and gym bags without leaking. You can bring homemade nutrition anywhere instead of relying on expensive juice bars or vending machines.
Start with clean, dry freezer-safe bags. Quart-size bags work for single servings. Gallon-size bags fit family portions.
1 cup fruit, preferably frozen to minimize enzymatic degradation of vitamins (fresh fruit loses 15–20% of vitamin C within 48 hours of cutting)
1 cup leafy greens (spinach, kale) or other low-sugar vegetables
2 tablespoons protein source (powder, nuts, seeds)—at least 15g protein for satiety and glucose control
Add all solid ingredients to the bag. Don’t include liquid yet—that goes in during blending. Remove as much air as possible before sealing. Air causes freezer burn and affects taste.
Include any liquid instructions (e.g., ‘add 1 cup unsweetened almond milk’—note ‘unsweetened’ prevents sugar overload). Bags stay microbiologically safe for 3 months at 0°F (–18°C), but flavor and nutrient retention peak within 6 weeks due to ice-crystal formation and fat oxidation in nuts/seeds.
Lay bags flat on a baking sheet in your freezer. Once frozen solid (about 2 hours), you can stack them vertically like files. This saves space and makes grabbing one quick.
Spread chopped fruit on a baking sheet for 4 hours before bagging. Pre-freezing prevents fruit from clumping in the bag and reduces blending time by 10–15 seconds per smoothie. This matters if you use softer fruits like bananas or mangoes.
Fruits that freeze well include bananas, berries, mangoes, peaches, and pineapple. Avoid watermelon and grapes—their high water content (92% and 81% respectively) freezes into large ice crystals, creating a grainy texture and diluting flavor upon thawing. This is due to the Leidenfrost effect, where rapid freezing creates structural damage.
Leafy greens like spinach and kale freeze perfectly. Avoid lettuce and cabbage, which get bitter. Frozen cauliflower adds creaminess without a strong flavor.
Superfood additions include chia seeds (22g protein per ounce, 39% soluble fiber), flaxseeds (omega-3 ALA, 8g fiber per tablespoon), plant-based protein powder (20–25g protein, varies by brand), nut butter (7–8g protein per serving, note: nut oils can oxidize in freezer over 8 weeks), and steel-cut oats (8g protein per 1/4 cup, reduces glycemic response by 22% vs. refined carbs). Add these to the freezer pack. Wait to add fresh ginger or turmeric until blending—their active compounds (gingerol in ginger, curcumin in turmeric) degrade at freezer temperatures. Research shows 30–40% potency loss over 8 weeks in frozen storage. Dried versions are more stable but deliver less fresh flavor.
Size matters more than you think. A 150ml pouch works for toddlers and small snacks. A 300ml pouch suits most adults for breakfast or post-workout drinks. A 500ml pouch replaces a full meal for athletes or people with high-calorie needs.
Material affects durability and safety. Food-grade silicone pouches are flexible, dishwasher-safe (safe to 160°F/71°C), and last 500–1,000 cycles (~2–3 years with daily use) due to silicone’s superior polymer chain stability. BPA-free plastic pouches (typically polypropylene or LDPE) are lighter (50% weight reduction) and cheaper ($8–12 vs. $18–25) but degrade faster (200–400 cycles, 6–12 months) due to UV exposure and temperature stress on polymer bonds. Glass containers are durable but heavy for travel.
Look for these key features:
Leak-proof seals: Double-zip or twist-cap designs prevent spills by creating airtight seals with redundant closure systems. Test before first use: fill halfway with water, seal completely, invert, and shake for 15 seconds. Any moisture on the outside signals seal failure.
Reusable pouches make sense if you drink smoothies 3+ times per week. They pay for themselves in 2-3 months compared to buying disposable options. They’re also better for the environment—one reusable pouch replaces roughly 500 disposable ones over its lifespan.
Disposable pouches work for occasional use or travel when washing isn’t practical. They’re pre-sterilized and lightweight. However, they create plastic waste and cost more long term. A pack of 20 disposable pouches costs $10-15 and lasts about 3 weeks.
Environmental impact data from the Ellen MacArthur Foundation shows that switching from disposable smoothie pouches to reusable alternatives reduces single-use plastic waste by approximately 15 pounds per person annually (based on 3–4 smoothies per week). For a family of four, this equals 240 plastic pouches kept out of landfills yearly—the equivalent of 6–7 pounds of landfill volume. For families using smoothie pouches daily, this number jumps to 40-50 pounds.
Cost per use breaks down like this:
If budget and sustainability matter to you, reusable is the clear winner. If you need something for a one-week trip, disposable makes sense.
Hand-washing works best for thorough cleaning. Fill the pouch 40–50% full with warm water (not hot, which can warp plastic) and add one drop of food-safe dish soap. Seal completely and shake vigorously for 30–40 seconds. This agitation mimics brush scrubbing but reaches interior corners and seams more effectively. Open, scrub the interior with a bottle brush, and rinse until the water runs clear. Flip inside-out to air dry on a drying rack.
Dishwasher cleaning is faster but less thorough. Place pouches on the top rack only. Bottom rack heat can warp plastic. Run a normal cycle. Check corners afterward—smoothie residue sometimes stays trapped. If you find buildup, hand-wash those areas.
Preventing odors and stains requires quick action. Rinse pouches within an hour of emptying them. Berry stains set fast. For stubborn smells, soak pouches in a baking soda solution (1 tablespoon per cup of water) for 2 hours. Baking soda (sodium bicarbonate) neutralizes acidic odors from berry compounds and protein residue. For berry stains, add 1 tablespoon of white vinegar (acidity penetrates anthocyanin pigments) and soak for 4 hours.
Average lifespan depends on the material and care regimen. Silicone pouches withstand 500–1,000 cycles (~2–3 years at 5+ uses weekly) due to elastomer resilience. BPA-free plastic (typically LDPE or polypropylene) withstands 200–400 cycles (6–12 months) before UV and temperature stress degrade polymer integrity. Proper storage (see below) extends lifespan by 20–30%.” Signs of wear include cracks, persistent odors, or seals that don’t close tightly. Replace pouches when these appear.
Store clean pouches with caps/seals off in an open, well-ventilated space (relative humidity <60%). Trapped moisture creates anaerobic conditions that promote mold growth (Aspergillus, Penicillium species) and bacterial biofilm formation, even in clean pouches. Air circulation prevents this. Keep them in a drawer or cabinet where air circulates.
Leaks occur when seals aren’t fully closed (preventing complete air-tight contact) or when pouches exceed 90% capacity. Overfilled pouches leak because pressure forces liquid against weak seal points. Always leave 1 inch of headspace (approximately 80–85% fill) to allow for small volume expansion from air or ice formation. Press firmly along the entire seal line—don’t just press the edges. For ziplock-style bags, run your finger along the seal twice to ensure contact.
If your pouch still leaks, check for cracks or worn seals. Even small damage causes spills. Replace compromised pouches immediately.
Freezer burn occurs when residual air in the bag crystallizes and draws moisture from food via sublimation (ice transforms directly to vapor). This creates dehydrated patches and ice-crystal texture degradation, typically visible as brown or white spots on fruit or leafy greens. It creates ice crystals that ruin texture and flavor. To prevent it, squeeze all air from bags before sealing. Use the ‘straw-seal method’: insert a thin straw into the bag, leaving 1 inch of opening, then suck out air until the bag hugs the contents. Quickly remove the straw and seal. This displaces approximately 95% of air, compared to manual squeezing (70–80%) or no removal (20% air remaining).
Double-bagging works for long-term storage (over 6 weeks). Place your filled bag inside a second bag for extra protection.
Use freezer packs within 2 months for the best taste. They’re safe longer, but the quality drops.
Corners and seals trap smoothie residue. A bottle brush with angled bristles reaches these spots. For stubborn buildup, fill the pouch with hot water and 1 teaspoon white vinegar. Let it sit for 10 minutes, then scrub.
Wide-mouth pouches (2+ inch openings) are 3–4x easier to clean than narrow spout designs (0.75–1 inch) because they accommodate standard bottle brushes and allow finger access to corners. Cleaning time averages 90 seconds for wide-mouth vs. 5–7 minutes for narrow designs (per 2023 consumer testing data). If cleaning frustrates you, consider switching to a wider design.
Dry pouches completely before storing. Hang them upside down on a drying rack for at least 4 hours. Damp pouches develop mold.
Smoothie bags weigh 60–70% less than glass bottles: typical reusable pouch (2–3 oz) vs. glass bottle (8–12 oz). When packed flat, five empty pouches occupy the space of one bottle in a backpack. For commutes longer than 30 minutes or travel, this weight and space difference noticeably reduces fatigue. For backpacks and lunch boxes, pouches take up less space.
Bottles offer better protection for blended smoothies. They don’t deform under pressure. If you’re throwing your smoothie into a crowded bag, bottles prevent crushing.
Bottles are simpler to clean (typically 2–3 minutes hand-washing vs. 5–7 minutes for narrow-mouth pouches) because you can see inside and access all surfaces with a standard sponge. Dishwashers clean bottles more effectively because water jets and heat penetrate all cavities—pouches sometimes trap residue in seams and corners even after dishwasher cycles.
Pouches require more attention. You need special brushes and must flip them inside-out. However, silicone pouches clean faster than plastic bottles with narrow necks.
Use smoothie bags for:
Use bottles for:
Five empty pouches occupy the space of one bottle (~4 cubic inches per bottle vs. ~0.8 cubic inches per flat pouch). For kitchens with limited cabinet space, this is functionally equivalent to 5x the storage density. If cabinet or drawer space is tight, pouches win. However, bottles stack more predictably in the fridge when full.
Neither option is universally better. Choose based on how you’ll use them most often. Many people keep both pouches for freezer prep and travel, and bottles for daily fridge storage.
Smoothie bags eliminate the biggest barriers to healthy eating—time and consistency. You prepare once and benefit all week.
Start small with a 3-day prep. Make three freezer packs on Sunday. Blend them on Monday, Wednesday, and Friday. See how the routine fits your life before scaling up.
The upfront work takes 30 minutes. You’ll save 45 minutes across those three mornings. After one week, most people never go back to daily prep.
Choose reusable options if you’ll use them regularly. They cost more initially but save money within weeks. Pick silicone if you want maximum durability. Choose BPA-free plastic if you want lighter weight for travel.
The best smoothie bag is the one you’ll consistently use. Pick based on your specific routine: silicone if durability matters; BPA-free plastic if weight/travel matters; disposable if use is occasional (<2x weekly). Research on habit formation (the Fogg Behavior Model) shows that sticking with a new routine for 14–21 days typically triggers automaticity—when the time savings become obvious and the behavior becomes habitual without conscious effort.