LWMFCrafts are simple, budget-friendly craft activities designed to engage children through hands-on learning. These projects use everyday household materials to build fine motor skills, creativity, and problem-solving abilities while reducing screen time and strengthening parent-child connections through shared creative experiences.
LWMFCrafts stands for “LookWhatMomFound Crafts”—a movement focused on turning everyday household items into creative learning opportunities for children. The concept started as a way to help parents provide meaningful indoor activities that go beyond passive entertainment.
These aren’t complicated art projects requiring expensive supplies. They’re practical activities using paper, cardboard, buttons, natural materials, and other items you already have at home. The goal is simple: give children hands-on experiences that build real skills while keeping them engaged and away from screens.
Research shows that children learn best when they actively participate in creating something tangible. When kids cut paper, arrange materials, or solve problems during craft time, they’re developing neural pathways that support future learning. LWMFCrafts activities tap into this natural learning process without feeling like structured education.
Craft activities offer measurable developmental advantages that extend far beyond the finished product.
2. Cognitive Growth When children plan a craft project, they practice sequencing, decision-making, and spatial reasoning. Deciding where to place pieces, choosing colors, or figuring out why something isn’t working builds problem-solving skills. These mental exercises create thinking patterns children use in academic settings later.
3. Emotional Expression Crafts give children a non-verbal way to express feelings and ideas. A child who struggles to articulate emotions might create art that shows their inner world. This creative outlet reduces frustration and builds emotional intelligence.
4. Screen Time Reduction The average child spends 5-7 hours daily on screens. LWMFCrafts provides an engaging alternative that naturally pulls attention away from devices. When children are absorbed in creating something physical, they don’t miss the screen.
5. Family Connection Parents who craft alongside children create shared memories and open communication channels. Kids are more likely to discuss their day or share concerns when working together on a project. This bonding time strengthens trust and emotional security.
You don’t need a fully stocked art studio to begin. Start with basics and add items as your child’s interests develop.
Paper Products
Adhesives
Coloring Tools
Cutting Tools
Natural Materials
Budget Estimate: $25-40 for a complete starter kit that lasts 3-6 months with regular use.
Don’t buy what you can repurpose. Toilet paper rolls become binoculars or bracelets. Egg cartons transform into caterpillars or paint palettes. Bottle caps serve as game pieces or mosaic tiles.
Check your recycling bin before shopping. Plastic containers, cardboard packaging, and glass jars all work as craft materials. Fabric scraps from old clothes create collages or stuffed projects.
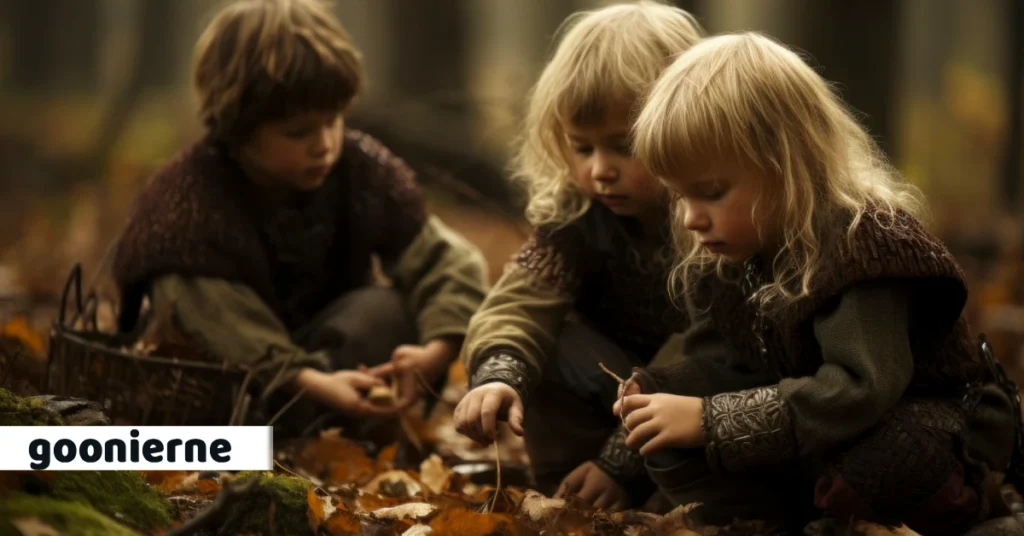
Nature provides free supplies year-round. Take short walks to collect materials by season—spring flowers, summer shells, autumn leaves, winter evergreen branches.
Match activities to your child’s developmental stage for the best engagement and success.
2. Torn Paper Collage (15 minutes) Show your child how to tear construction paper into pieces—no scissors needed. Arrange the pieces on a larger paper and glue them down. This activity strengthens hand muscles while introducing concepts like composition and pattern.
3. Nature Sorting Activity (10 minutes) Collect leaves, twigs, and stones during outdoor time. Back inside, sort items by size, color, or texture. Arrange them on paper to create patterns. This combines craft time with early math concepts.
2. Nature Collage Art (25 minutes) Use a nature walk to gather materials. Arrange items on cardboard to create a scene—forest, garden, or abstract design. Glue pieces securely. This activity teaches composition while connecting children to outdoor environments.
3. Sock Puppets (30 minutes) Use old socks as puppet bases. Attach buttons for eyes, yarn for hair, and fabric scraps for clothing. Create a simple puppet show together. This project builds narrative skills and imaginative play.
2. Mixed Media Self-Portraits (40 minutes) Combine drawing, painting, and collage to create self-portraits. Use mirrors for observation. Add fabric, yarn, or magazine cutouts for texture. This project encourages self-reflection and advanced artistic techniques.
3. Upcycled Home Decorations (50 minutes) Transform jars into candle holders, bottles into vases, or tin cans into pencil holders. Decorate with paint, fabric, or natural materials. These functional items teach sustainability while creating useful household objects.
Preparation prevents frustration and maximizes creative time.
2. Organize Supplies for Independence Store materials in clear containers at child height. Label bins with pictures for non-readers. When children can access supplies independently, they’re more likely to engage in spontaneous creative play. Rotate materials monthly to maintain interest.
3. Set Realistic Time Expectations Toddlers engage for 5-10 minutes. School-age children can focus for 20-30 minutes. Teens might work for an hour on complex projects. Stop before frustration sets in. Multiple short sessions work better than one long push.
4. Build in Clean-Up Time Make tidying part of the activity, not an afterthought. Set a timer for “last 5 minutes.” Play cleanup music. Children who help clean are more likely to craft again tomorrow. Teach that finishing includes restoring the space.
5. Safety Guidelines by Age Supervise all scissors use under age 5. Keep small items away from children who still mouth objects. Use only non-toxic, washable materials. Store sharp tools and adult-only supplies out of reach. Check for choking hazards with younger siblings present.
Real obstacles have practical solutions.
2. Maintaining Interest When Attention Wanes Offer choices between two projects. Introduce a new material mid-activity. Take a movement break and return fresh. Some days aren’t craft days—that’s fine. Never force participation.
3. Adapting Projects for Mixed Skill Levels Siblings can work on the same theme at different complexity levels. One child draws a garden while another creates a 3D flower. Offer the same materials but different challenges. Focus on individual progress, not comparison.
4. Handling Project Failures Projects don’t always work as planned. That’s a learning opportunity, not a disaster. Ask what went wrong. Brainstorm solutions together. Sometimes starting over teaches more than getting it right the first time. Celebrate effort over outcome.
5. Storing Finished Crafts Designate a display area for recent work. Rotate pieces monthly. Photograph projects before recycling. Create a digital album of your child’s work. This preserves memories without cluttering your home. Let children choose special pieces to keep long-term.
Consistency builds skills better than occasional marathon sessions.
2. Seasonal Project Calendars Plan activities around seasons and holidays. Spring nature crafts, summer outdoor projects, fall leaf art, winter indoor creations. This connects children to yearly rhythms and provides built-in themes.
3. Balancing Structure with Spontaneity Keep basic supplies accessible for unplanned creative moments. Not every project needs preplanning. Some of the best work happens when children independently grab materials and start creating. Balance scheduled craft time with open-ended availability.
4. Measuring Developmental Progress Notice improvements in scissor control, attention span, or problem-solving. Take photos monthly showing skill development. Compare January drawings to December drawings. Share observations with your child: “Remember when circles were hard? Look at what you drew today.” This builds metacognition and pride in growth.
LWMFCrafts activities transform everyday household items into powerful learning tools. These projects require minimal investment but deliver substantial developmental benefits. Fine motor skills strengthen. Problem-solving abilities grow. Family connections deepen.
Start with whatever materials you have available. Choose one age-appropriate project this week. Focus on your child’s experience rather than the finished product. The mess cleans up. The skills last a lifetime.
Your children won’t remember perfect crafts. They’ll remember time spent creating together, problems solved, and the feeling of making something with their own hands. That’s what LWMFCrafts offers—practical creativity that fits real family life.